I recently decided to make the jump to medium format photography and I acquired this amazing Kiev-60 to start me off. I may be exaggerating when I say "amazing", for just the fact that I have a medium format camera has made me quite excited. This post is just giving some background information about this camera.
For $50 how could I resist? The Kiev-60 is simply put, an SLR on steroids. It is massive, in size and weight. The Kiev-60 was produced in the mid-80's to mid-90's, in the Ukrainian Arsenal factory. That means about half of its production run was completed under the Soviet Union's control. The fact that the Soviet factories were notorious for a lack of quality control, does not put much faith into the functionality of this camera. In fact, the Kiev-60 was a modification of the original Kiev-6C. In turn, the Kiev-6C was a cheaply made Russian knock-off of the quality Pentacon-6. I've never had so many doubts about the functionality of any camera than this one. I did some research about possible issues with the Kiev-60. There have been numerous complaints about faulty winding mechanisms.
However, I jumped on the opportunity to own a MFC and a piece of history. When I received my camera, I was completely shocked. This Kiev-60 is in pristine condition, almost as if it had never been used. There was a minimal amount of dust, even on the lens. No scratches or scuffs were evident on the body. The Kiev-60 came with a large metered prism, which sits dominantly on top of the body, as well as a smaller top-down viewer. I checked out the meter and it appears to function well, my only complaint being the somewhat hard to read interface. Everything is in Russian, including the marks on the film counter. The instruction booklet (yes that's right, it came with the original instruction booklet, in Russian) emphasizes a precise technique to wind the film. No excessive force must be used, but the cocking lever must be wound slowly and steadily, and the return must be just as precise. Another quirk I discovered is that the camera must be cocked and set up 3 times after loading the film, before you can start shooting anything.
Looking through the massive viewfinder, all appears crystal clear. Activating the meter exposes two small bright red dots in the upper section of the viewfinder. Twisting the dials on top of the meter allow me to find the correct shutter speed and the optimal aperture. It alerts me when all is well by illuminating both red dots. The left dot is lit when the image is underexposed, and the right one is lit if the image is overexposed. This can get a little tricky because you can maneuver the meter dial half-way between shutter speeds and the exposure would be correct, however the shutter physically cannot fire at speeds between 1/250 and 1/500. Another minor flaw I noted was how one of the red dots appeared to be slightly higher than the other, appearing offset slightly. Maybe its just another quality I can attribute to the fact that it was build in the USSR.
I set out with the cheapest roll of Black and White 120 film I could find, and was determined to test out this camera in all sorts of situations. I shot some outdoor photographs of things just in my back yard, as well as a couple portraits. I could not be more pleased with its performance, all the shutter speeds worked flawlessly, the mirror snaps up as it should, and the aperture blades look sharp and clean. I'm very excited to get the film developed and see the results. I'm super excited to have this camera and I'm sure there will be lots of great experiences to be had.
As always, thanks for reading and be sure to check out my Flickr page for more cool photos!
Evan Sahagian Photography
Freelance Photographer
Pioneer Valley

Friday, August 24, 2012
Wednesday, July 25, 2012
Photo Journey Through the Bog
Recently, I took a trip to New London, New Hampshire. I was traveling with my girlfriend and she decided to take me to one of the spots she remembers going to as a child. Since I had never been to a bog before, I was excited. The bog we went to was called the Philbrick-Cricenti Bog. The bog is an old pond where peat moss has overgrown across the water. The water has an unusually high pH level. As a result, the high pH water preserves most of the dead vegetation, preventing the growth of decaying mold and fungus. When we arrived, we simply pulled over on the side of the road and walked into the forest. The bog is maintained by the New Hampshire Parks and Recreation division, so there were signs and maps of the area. We followed the trails around the bog on a set route. The trails were marked by wooden planks on which we were to walk, in order to keep from sinking into the bog.
Upon exiting the denser vegetation, we were able to view the heart of the bog. The bog seemed to go on and on. It resembles a field and made me almost feel like running through it. Yet the bog is deceiving. What appears to be a flat open field is in reality, just thin growths of peat moss. The moss is penetrated by trees here and there, but most of the plant life grows on the moss itself.
Some of the information we were provided told of several horses and cows from local farms that had fallen into the bog. The lighter patches show where such accidents might have occurred. The bog is known for its red peat moss, which blends with the typical green moss.
I was interested to note that the bog seemed almost half-dead and half-alive. Many of the plants grow around dead ones, and many of the living plants have dead branches or leaves.
Another curiosity I found was on the dead trees in the bog. Many of them were covered in an odd fungi. I have never seen anything like it before. The fungi appeared to be dead as well, lending itself to the silent rest of the bog.
We had a nice little journey through this bog and we had some unique experiences along the way. I thought it was a lot of fun, plus you'd be surprised how little mosquitoes there are. I'd recommend blowing up the photographs in order to fully see the detail. As always, Thanks for reading!
 | |
| All of the trails were composed of these flimsy wooden planks |
 | ||||
| The lighter patches are the areas where the moss is thinnest |
 |
| A handy "Danger" sign and a marker in disrepair are all I need to go no further |
Some of the information we were provided told of several horses and cows from local farms that had fallen into the bog. The lighter patches show where such accidents might have occurred. The bog is known for its red peat moss, which blends with the typical green moss.
 | |
| With almost every step, water would bubble up around the walking boards, you can almost see through the moss here |
Another curiosity I found was on the dead trees in the bog. Many of them were covered in an odd fungi. I have never seen anything like it before. The fungi appeared to be dead as well, lending itself to the silent rest of the bog.
 | |
| The eerie remnants of a long-dead tree |
Monday, May 7, 2012
The Basics
Here I'm going to discuss the basic principles of photography. The first thing to remember is that there are three key aspects that must work in harmony to get a good exposure. The most important thing to remember is that everything is dependent on light. Everything you adjust on your camera has to do with light, whether you need more or less. Light is everything.
The first is Shutter Speed. Simply put, the shutter speed of a camera tell the user how fast or slow a shutter opens and closes. For the majority of photographs, shutter speeds will be very fast. Cameras typically range from very long exposes, such as 30 seconds, to incredibly fast, like 1/8000th of a second. There are consequences to using such fast or slow shutter speeds. The fact is, the faster the shutter speed, the less light makes it to the film, or sensor, and vice versa for slow shutter speeds. You may end up with a bright, over-exposed image if your shutter speed is too slow, and you might get a dark under-exposed image if it's too fast. Shutter speed is one of the things most frequently adjusted when shooting in Manual mode, so don't just set it and forget it. Using slower shutter speeds can yield some very interesting exposures, especially when shooting moving objects.
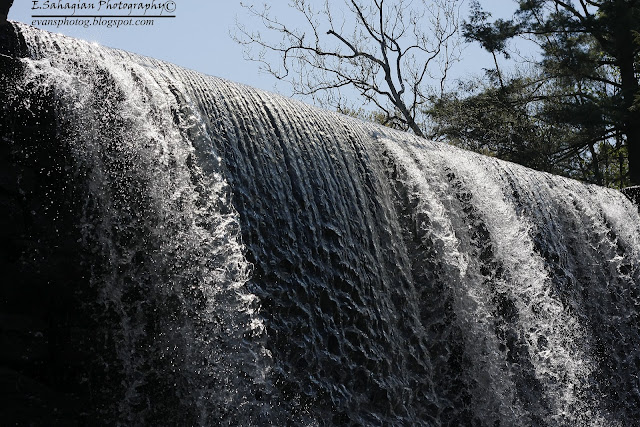
However, using a fast shutter speed can capture moments and freeze them in time, much like the water in the image below, you can make out individual water droplets that the naked eye may have missed.
The second important concept to be aware of is Aperture. Essentially aperture is a series of small blades inside the camera lens that open and close to allow more or less light in. Apertures can be a little tricky to master. They can range from 1.2/f to 32/f. Each increment is referred to as F-Stops. The trick is remembering that the smaller the number is, the wider the aperture gets, and therefore the more light gets to the film or sensor. And as with shutter speed, if too much light reaches the sensor or film, the more over-exposed an image becomes, and the more under-exposed and image becomes if the aperture is too large. Most lenses tend to have a "sweet spot" where they are the sharpest. This spot usually ranges from 8/f to 10/f depending on the lens. There are other neat effects created by adjusting the aperture. A very wide aperture creates a shallow depth of field. The depth of field determines how much of the photograph is in focus. A high aperture creates a deep depth of field, which results in most of the image being in focus. The depth of field is applied to the background of the photograph. So in portraits, for example, the subject may be in focus and the background may be blurred, or it might be as sharp as the subject.
Here is an example of using a high aperture, about 16 in this image. Most macro photography uses a higher aperture in order to get the full photograph into sharp focus.
The last thing that beginners should worry about is the ISO, or ASA (film speed), depending on what you're shooting. The film speed determines how sensitive the film is to light. Film is rated from 6 to up to 3200. There is a tradeoff with the different speeds of film, as there is for aperture and shutter speeds. The slower film, or ISO, is the slower your shutter speed needs to be to compensate. Lower ISOs and ASAs are not very sensitive to light and require a lot of light before an image is correctly exposed. Higher ISOs and ASAs require less light and are better for indoor photography or sports photography. Another trade off is the amount of grain that will be present in your images. The faster ISOs and ASAs create a lot of visible grain in your images, regardless of how they are exposed.
Photography requires a constant balance of ISO, Shutter speed, and Aperture, in order to create a good exposure. There must be constant compensation for an increase of any of these areas. Yet used in different ways, and combining them with various techniques, you can get some very cool and interesting effects.
The first is Shutter Speed. Simply put, the shutter speed of a camera tell the user how fast or slow a shutter opens and closes. For the majority of photographs, shutter speeds will be very fast. Cameras typically range from very long exposes, such as 30 seconds, to incredibly fast, like 1/8000th of a second. There are consequences to using such fast or slow shutter speeds. The fact is, the faster the shutter speed, the less light makes it to the film, or sensor, and vice versa for slow shutter speeds. You may end up with a bright, over-exposed image if your shutter speed is too slow, and you might get a dark under-exposed image if it's too fast. Shutter speed is one of the things most frequently adjusted when shooting in Manual mode, so don't just set it and forget it. Using slower shutter speeds can yield some very interesting exposures, especially when shooting moving objects.
 |
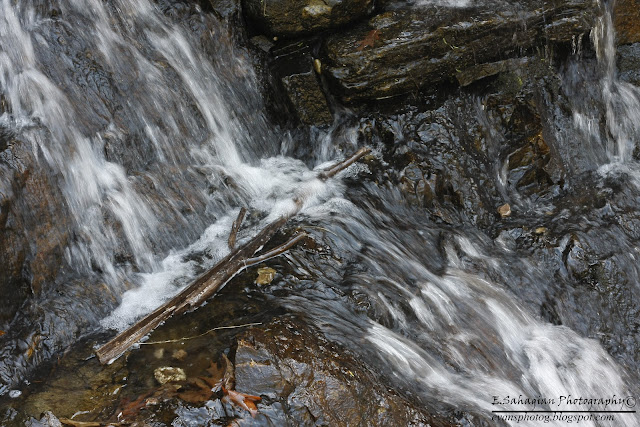
| Using a slow shutter speeds allows the water to look smooth and streaky |
 | ||
| High shutter speeds make the water freeze in time |
 |
| Notice how the background is blurred to the point where you can't recognize it |
 |
| With a large aperture, the background is sharply in focus with the rest of the image |
Photography requires a constant balance of ISO, Shutter speed, and Aperture, in order to create a good exposure. There must be constant compensation for an increase of any of these areas. Yet used in different ways, and combining them with various techniques, you can get some very cool and interesting effects.
Tuesday, April 24, 2012
Black and White
I love film. Black and white, especially. If I could, I'd spend countless hours in a darkroom making prints and developing film. 35mm is all I have experience with, for now. I'm getting pretty excited about delving into the world of Medium format and 120 film. I'll stick to talking about 35mm black and white film for the time being. I learned to process and print my own film a few years ago, in school. And the love for it has grown since then. There's just something magical about shooting with film, feeling the tension in the advance and winding lever, watching images simply appear out of the gloom when developing prints. Maybe it's the smell of developer getting to me, but working in a darkroom is one of the most enjoyable things in my life.
As I said earlier, I was once a beginner. And I shot with a fairly high-end camera, a Canon EOS Elan IIe. And the best part of using such an electronically controlled camera, was the ability to auto-wind and leave a little tail to pull the film through when I was developing. However, all that plastic just didn't feel real to me. A little while ago, I came across an old 1960's-1970's Yaschica TL-Super film camera. It's got that beautiful black vinyl wrap-around, and made of enough metal to hurl through a window (Disclaimer: don't throw cameras through windows)
One of my favorite things about this camera is the lens mount. The Yashica uses the Pentax M-42 lens mount, which means that I can swap this lens for a plethora of other lenses. I have an old non-functioning Ricoh SLX 500, which uses the same lens mount and the Ricoh had a nice macro lens and a wide angle lens which has since been re-purposed to my Yashica.
I aquired this camera from goodwill (and in completely functional condition). And on the bottom is an inscription from the previous owner: a man from Cressona, Pennsylvania who had served in the navy and had taken this camera with him on multiple tours of duty. It absolutely fascinates me to know where this camera has been and what it has "seen". To me, every camera has a story and it's always interesting to know where they come from, or how they were used and when they were used.
I think I'll be shooting with black and white film for a very long time to come. Nothing quite compares to it, and digital quality just isn't the same. Besides, barring painting your own pictures, there's no better hands-on feeling you get from shooting, to developing, to printing your own photographs. That's why I love film and will continue to love it for the rest of my life.
As I said earlier, I was once a beginner. And I shot with a fairly high-end camera, a Canon EOS Elan IIe. And the best part of using such an electronically controlled camera, was the ability to auto-wind and leave a little tail to pull the film through when I was developing. However, all that plastic just didn't feel real to me. A little while ago, I came across an old 1960's-1970's Yaschica TL-Super film camera. It's got that beautiful black vinyl wrap-around, and made of enough metal to hurl through a window (Disclaimer: don't throw cameras through windows)
.JPG) |
I aquired this camera from goodwill (and in completely functional condition). And on the bottom is an inscription from the previous owner: a man from Cressona, Pennsylvania who had served in the navy and had taken this camera with him on multiple tours of duty. It absolutely fascinates me to know where this camera has been and what it has "seen". To me, every camera has a story and it's always interesting to know where they come from, or how they were used and when they were used.
I think I'll be shooting with black and white film for a very long time to come. Nothing quite compares to it, and digital quality just isn't the same. Besides, barring painting your own pictures, there's no better hands-on feeling you get from shooting, to developing, to printing your own photographs. That's why I love film and will continue to love it for the rest of my life.
Welcome to my Blog!
First and foremost, welcome to my photoblog. Most of what I'll be doing here is showcasing my photographs, discussing what I love about photography, and offering any advice I can.
Subscribe to:
Posts (Atom)


